Refacing Kitchen Cabinet Doors With Beadboard
There's a brand new kid on the block and girlfriend, she's got TALENT! I'm excited to introduce y'all today to Brandi from the DIY blog: "Nest of Bliss" – Creating a Beautiful Home one Twig at a Time. I came across Brandi's lovely blog recently and was totally wowed by her eye for design, DIY skills, and love of coastal decorating. For this Guest Feature Friday, Brandi will show us how to give your kitchen a Budget Cabinet Makeover by refacing the cabinets with a bit of wood and you won't believe this… bead board wallpaper! How clever is that? Please give Brandi a warm welcome!
 Hello Sand & Sisal readers! I'm Brandi from Nest of Bliss, I'm so excited to meet you all!
I've been a huge fan of Kim's for a long time now, so when she asked me to come visit today I was delighted!
My fiancé and I live in a century farmhouse in the maritimes that we have been working to fix up on a budget. This includes a LOT of DIY and sometimes getting pretty messy. We're often covered in drywall dust and paint. 🙂

(Probably covered in paint in the lower half of this photo)
Lately, we've been working to make our little kitchen function better. (See my kitchen progress here!) Here's a photo of our kitchen upon moving in:

(Yup, that's navy blue and burgundy flooring.)
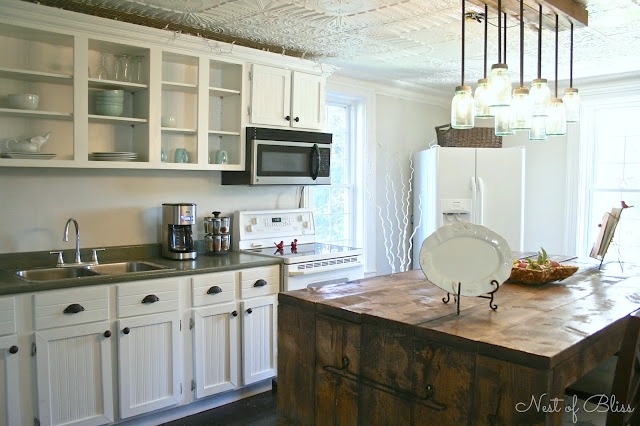
And here's our kitchen today. Still a little ways to go, but progress is progress, right?

Our biggest issue that we had with our kitchen was our cabinets – The doors fell off almost constantly!
New cabinets just weren't in the budget, so we found a way to make the doors more sturdy by thickening up the door frames, while of course taking advantage of this opportunity to give them a little makeover. 😉
For this Budget Cabinet Makeover you will need the following items:
(Amazon affiliate links provided for your shopping convenience)
1) The first step is to remove your cabinet doors and hardware, and place them down on a workable surface with the outside facing up.
2) Next, measure the outside edges around your cabinet doors for each cabinet that is a different size, this is the measurement for the wood you will be cutting.
3) Cut your plywood into 2 inch wide strips (or the width of your preference) and then cut the strips to the measured dimensions you took before, mitering the edges.
4) When you are finished you may begin measuring the beadboard wallpaper to the size of your cabinet doors, using a straight edge and pencil to draw a cutting line.

5) Using your X-Acto knife, cut according to your drawn lines (If you mess up a little, it's okay! Your wood will be covering some of the outer edges!)

6) Apply your beadboard wallpaper to the doors according the package directions. Keep an eye on your wallpaper as it is drying, so you can smooth out any bubbles along the way!

7) Using wood glue, apply your outer frame for your cabinets.

8) When this was dry, we secured a few screws from the inside for extra support to hold the frames.

Tip: We used clamps on our doors as the wood glue dried, this is completely up to you. 🙂

9) Apply caulking to your mitered edges to help minimize cut lines, and also to the inside and outside edges where your frame meets up with your existing cabinets – this just creates a smoother transition. We dipped our fingers in water and glided them along the edges to make them smooth.


When your caulking is dry you may choose to paint your doors, or attach them to your cabinets first. We chose to paint and apply our hardware when the doors were up, just to be sure of where we wanted to put our handles (which was a slightly different position than we chose originally!)

After you've applied your coats of paint, you can choose to seal with the protective coating of your choice. Then of course, you are finished!
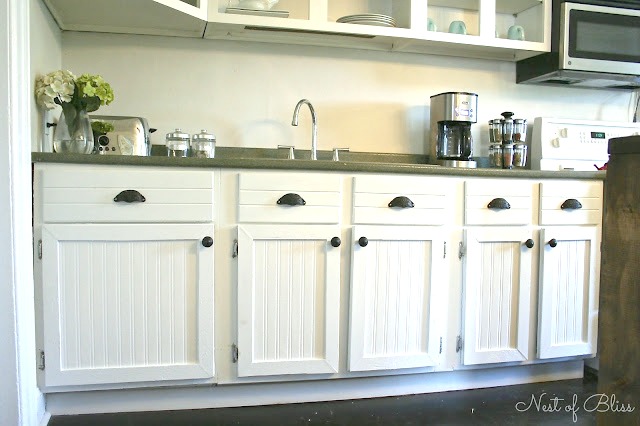
We are so happy with how our cabinets turned out, and not a door out of place. 😉
It's been wonderful meeting you all! Please stop by Nest of Bliss for a visit soon!
TGIF
Brandi
Wasn't that budget cabinet makeover amazing? What a transformation! Please give Brandi your comment love and be sure to hop over and visit her blog and follow her on social media.
Kim

![]()
Refacing Kitchen Cabinet Doors With Beadboard
Source: https://www.sandandsisal.com/2013/09/budget-cabinet-makeover.html